Water doesn’t need a visible leak to cause damage. Concrete is porous, and soil surrounding your foundation holds moisture year-round. That moisture migrates through the concrete walls and floor as vapor, raising humidity levels inside your basement. Over time, elevated humidity feeds mold, warps wood framing, and degrades drywall — all materials used in a standard basement finish.
In Illinois and the broader Midwest, freeze-thaw cycles add another layer of stress. Water in the soil expands as it freezes, pushing against foundation walls. This hydrostatic pressure creates cracks over years, giving liquid water a direct path inside. A basement that looks perfectly dry in summer often shows its true nature after a heavy spring rain or snowmelt.
The financial stakes are real. Mold remediation alone averages between $1,500 and $9,000 depending on severity, according to industry cost data — and that doesn’t include replacing ruined finishes. Addressing moisture before you finish is almost always cheaper than addressing it after.
Not every basement needs the same level of waterproofing. Some need a full interior drainage system. Others just need a vapor barrier and a dehumidifier. The right answer depends on what your basement is actually doing right now.
Walk your basement after a significant rain — ideally 24 to 48 hours after a heavy storm. Look for wet spots on the floor, water stains along the base of the walls, efflorescence (those white chalky mineral deposits on concrete), and any musty odor. Each of these signals active moisture intrusion, not just ambient humidity.
Check your window wells if you have them. Poorly drained window wells are a common entry point. Look at the wall-floor joint, called the cove joint — this is where hydrostatic pressure most often forces water in. If you see any evidence of water at that seam, you have an active water management problem that needs to be solved before framing begins.
These two terms get used interchangeably, but they describe different scopes of work. Waterproofing refers to systems that actively manage and redirect water that enters or tries to enter the basement — interior drainage channels, sump pumps, and exterior membrane systems. Moisture control refers to managing vapor and humidity levels, typically through vapor barriers on walls and floors, proper insulation, and dehumidification.
A basement with no signs of liquid water intrusion but high humidity levels needs moisture control, not necessarily full waterproofing. A basement that shows seepage after rain needs waterproofing. Many basements need both.
The distinction matters because it affects cost, timeline, and what work needs to happen before your contractor starts framing walls. A vapor barrier installation is a one-day job. A full interior drainage system with sump pump installation is a multi-day project that involves breaking the concrete floor perimeter. You want that work complete and the concrete cured before any finished flooring goes down.
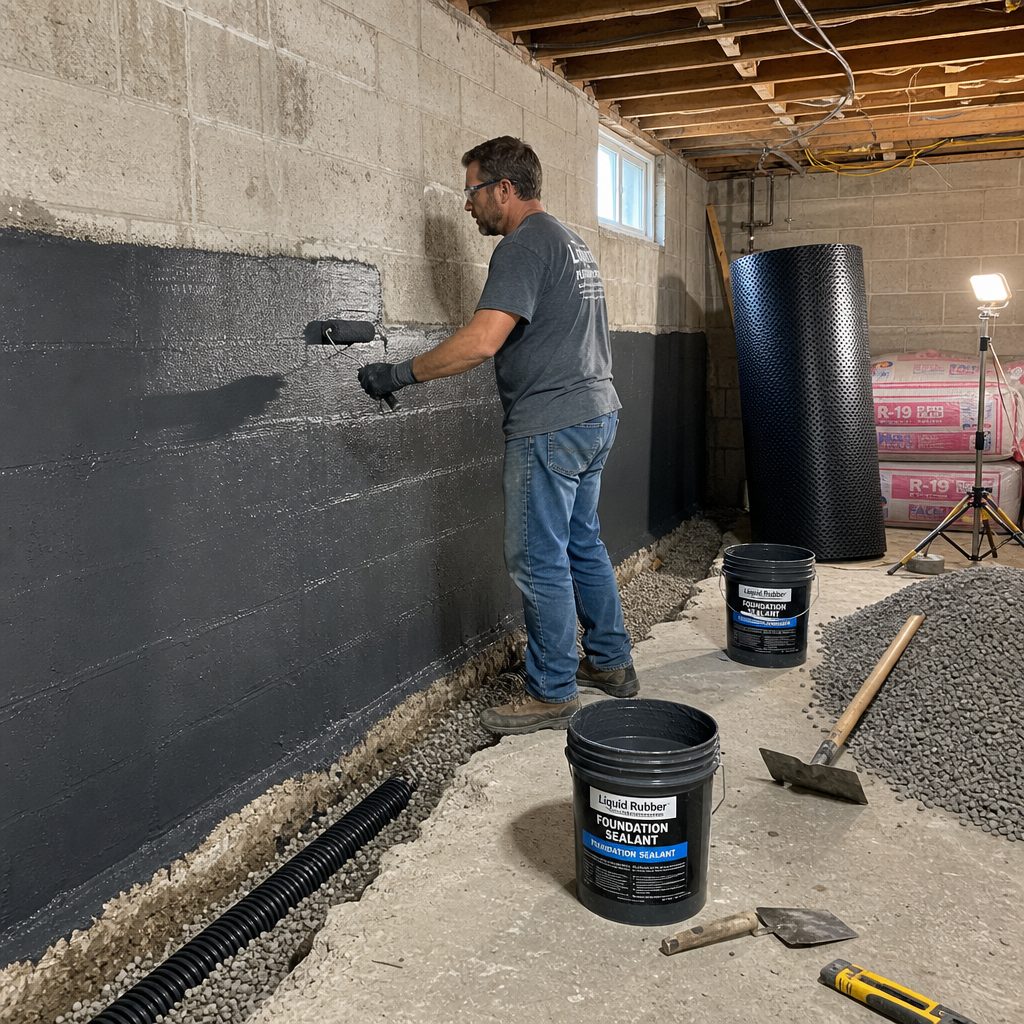
Exterior waterproofing is the gold standard — it addresses the source of water before it ever reaches your foundation. It involves excavating around the home, applying a waterproof membrane to the exterior foundation walls, and installing drainage board and French drains. It’s highly effective but also expensive and disruptive, typically running $10,000 to $30,000 or more depending on the home’s perimeter.
Interior waterproofing systems are far more common for finished basement projects. These systems install a perforated drain channel along the interior perimeter of the basement floor, collect water that enters through the cove joint and walls, and direct it to a sump pit where a pump expels it from the home. Bob Vila’s comprehensive basement waterproofing overview outlines how these systems work and when each approach makes sense.
For most homeowners finishing a basement, an interior drain tile system paired with a quality sump pump — ideally with a battery backup — provides reliable, lasting protection. It doesn’t stop water from entering the wall, but it captures and removes it before it damages your finished space.
If you’re in a region with a high water table, significant seasonal rainfall, or clay-heavy soil — all of which describe much of Lake County, Illinois — a sump pump is not optional. It’s essential. A sump pump removes water that collects in the pit before it can rise and flood the floor.
A battery backup sump pump is worth every penny. Power outages and heavy storms tend to happen at the same time. Without battery backup, your pump stops working exactly when you need it most. For a finished basement, that’s a catastrophic scenario.
Even if your basement has no visible water problems, a vapor barrier belongs between your concrete and any finished materials. Concrete wicks moisture from the soil constantly. Without a barrier, that moisture enters your flooring, subfloor, and framing over time.
On floors, a dimple mat or rigid foam insulation with a poly vapor barrier creates separation between the concrete and your finished floor. On walls, rigid foam insulation installed directly against the concrete — rather than a standard stud wall with fiberglass batt — controls condensation and provides thermal performance. Building Science Corporation’s research on vapor barriers explains the physics behind why this matters, particularly in cold climates like northern Illinois.
Skipping the vapor barrier to save money almost always results in flooring failures, musty odors, and mold within a few years. It’s one of the most consequential shortcuts a homeowner or contractor can take.
Mold needs three things: moisture, a food source, and the right temperature. Finished basements provide all three. Drywall paper is an excellent food source for mold. So is wood framing. Basement temperatures stay relatively stable year-round, which is fine — but combine that with any persistent moisture and you have exactly the conditions mold needs to establish itself.
The tricky part is that mold often grows inside wall cavities, behind drywall, where you can’t see it until the problem is significant. That’s why addressing moisture before you close up walls is so much smarter than hoping for the best. Once framing and drywall are in place, a mold problem inside a wall means opening it back up.
This depends on the type of work done. If an interior drainage system was installed, the concrete needs time to fully cure — typically 28 days for full strength, though most contractors allow finishing work to begin after 7 to 14 days in normal conditions. If sealants or coatings were applied to walls, follow the manufacturer’s cure time before framing against them.
Use this waiting period productively. Run a dehumidifier, monitor for any remaining moisture issues, and finalize your finish plans. A hygrometer — an inexpensive humidity meter — lets you confirm relative humidity is consistently below 50% before materials go in. That’s the threshold below which mold growth is significantly inhibited.
Some basements genuinely don’t need extensive waterproofing. If your basement has been dry through multiple wet seasons, shows no efflorescence, no staining, no odor, and no evidence of any seepage — and if your grading directs water away from the foundation — you may be in good shape with vapor barriers alone.
A professional assessment confirms this. An experienced contractor walks your basement, checks the exterior grade, inspects the window wells and foundation walls, and gives you an honest read on risk. That assessment costs little or nothing and provides real peace of mind before you commit to a full finish project.